
New to quilting? Here's a basic start…
Before I was approached to design the Forest Coat, I’d done very little quilting. I did a quilted coat for my degree(too many years ago!), I’d made an oven glove and a Christmas stocking about a year ago and that was it. And I didn’t even count that as quilting, because quilting, as far as I knew, was piecing bits of fabric together into a blanket but I now understand that that is only one aspect of quilting.
Yes you can piece fabrics together (which is an art form in itself) but you can also just quilt a large piece of fabric, a concept, I think, gets really overlooked. The act of quilting is simply stitching layers of fabric together in a particular design. So by simply stitching a pattern across layers of fabric, you are in fact, quilting. Bonus is, it’s actually pretty straight forward to do and not as complex as I imagined, so I wanted to break it down for anyone else out there, who like me, is a total newbie. This little article should help you get well on your way to quilting for the Forest Coat or any basic form of quilting.
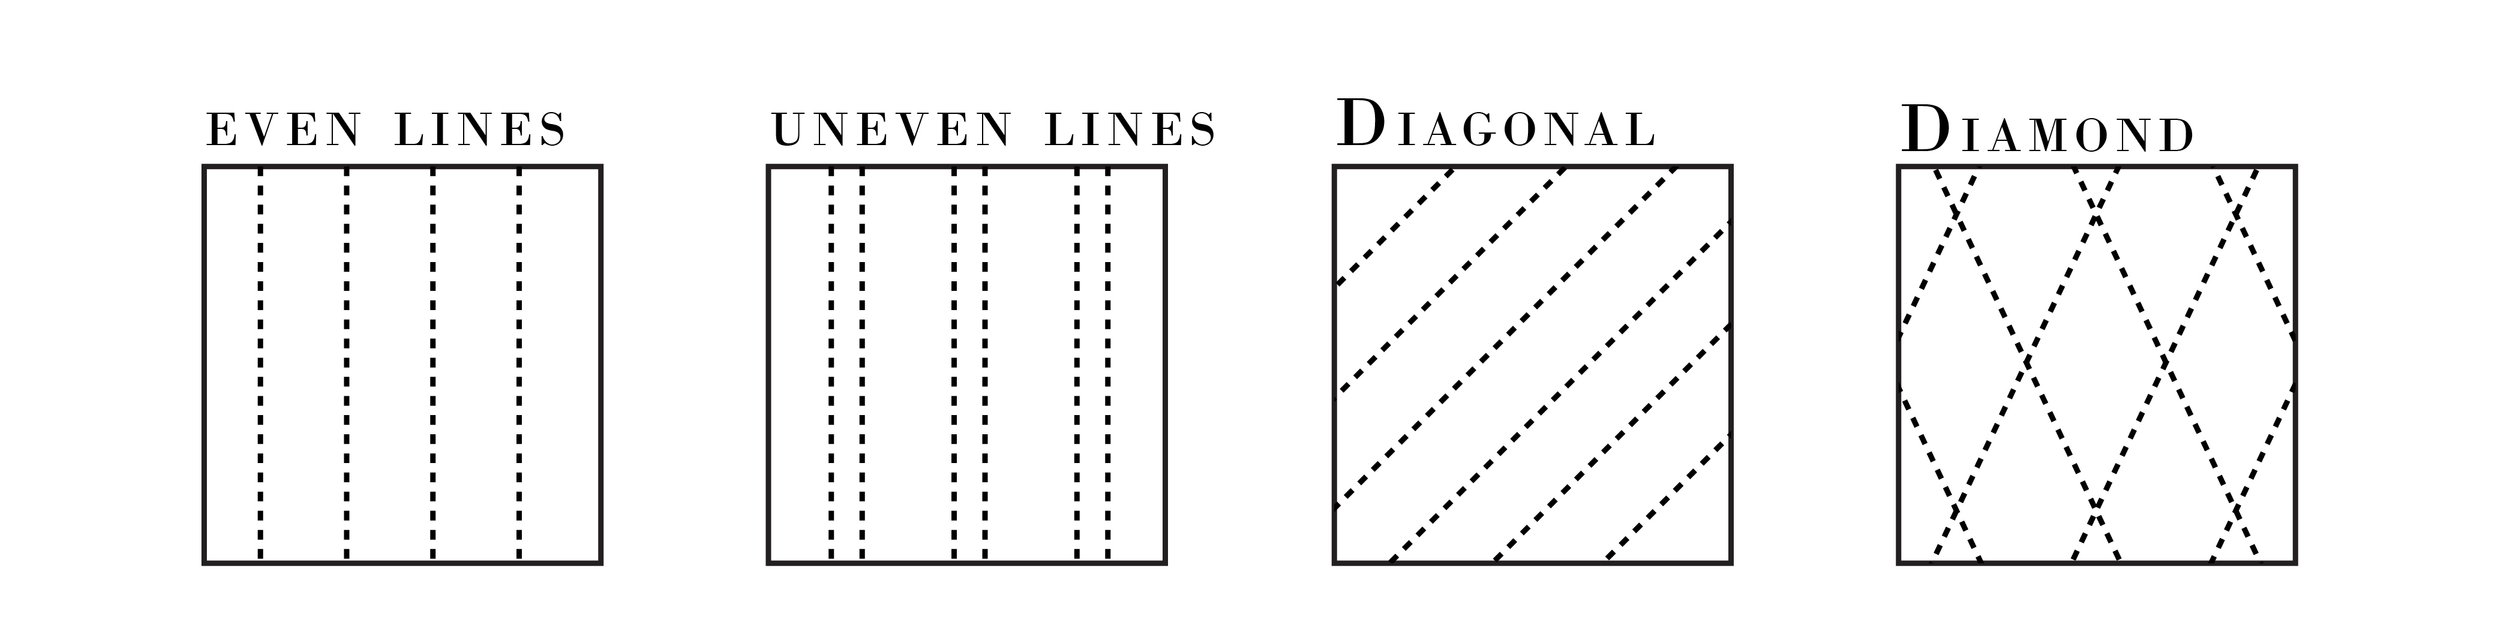
Some examples of simple quilt designs
You will be creating what is known as a ‘fabric sandwich’. This consists of a top layer, a layer of wadding (also known as batting) and a bottom layer. By sewing these three layers together, you are making your fabric sandwich, which you will then work with, as though it is one layer of fabric.

The ‘Fabric Sandwich’ is made up of a top layer of fabric, a middle layer of wadding and a bottom layer of fabric.
Quilting large areas of fabric like this can cause a lot of shifting between all the layers and here’s some pointers on how to prevent that from happening. But first, a quick look at why fabric can shift so easily when quilting.
If you look at all your layers in relation to your machine, you might begin to understand. Your presser foot rests against the top fabric, the feed dogs pull the bottom fabric along, while the layer of wadding sort of just floats in between. The feed dogs will have a tendency to drag the bottom fabric through quicker than the top fabric because the wadding reduces the amount of grip between the presser foot and the feed dogs. Your aim is to keep the top and bottom layers together as much as possible. The best fabrics to use are tightly woven fabrics (quilting cottons being an obvious choice) because they’re very stable, don’t drag and pull quite as much and are basically easier to work with.
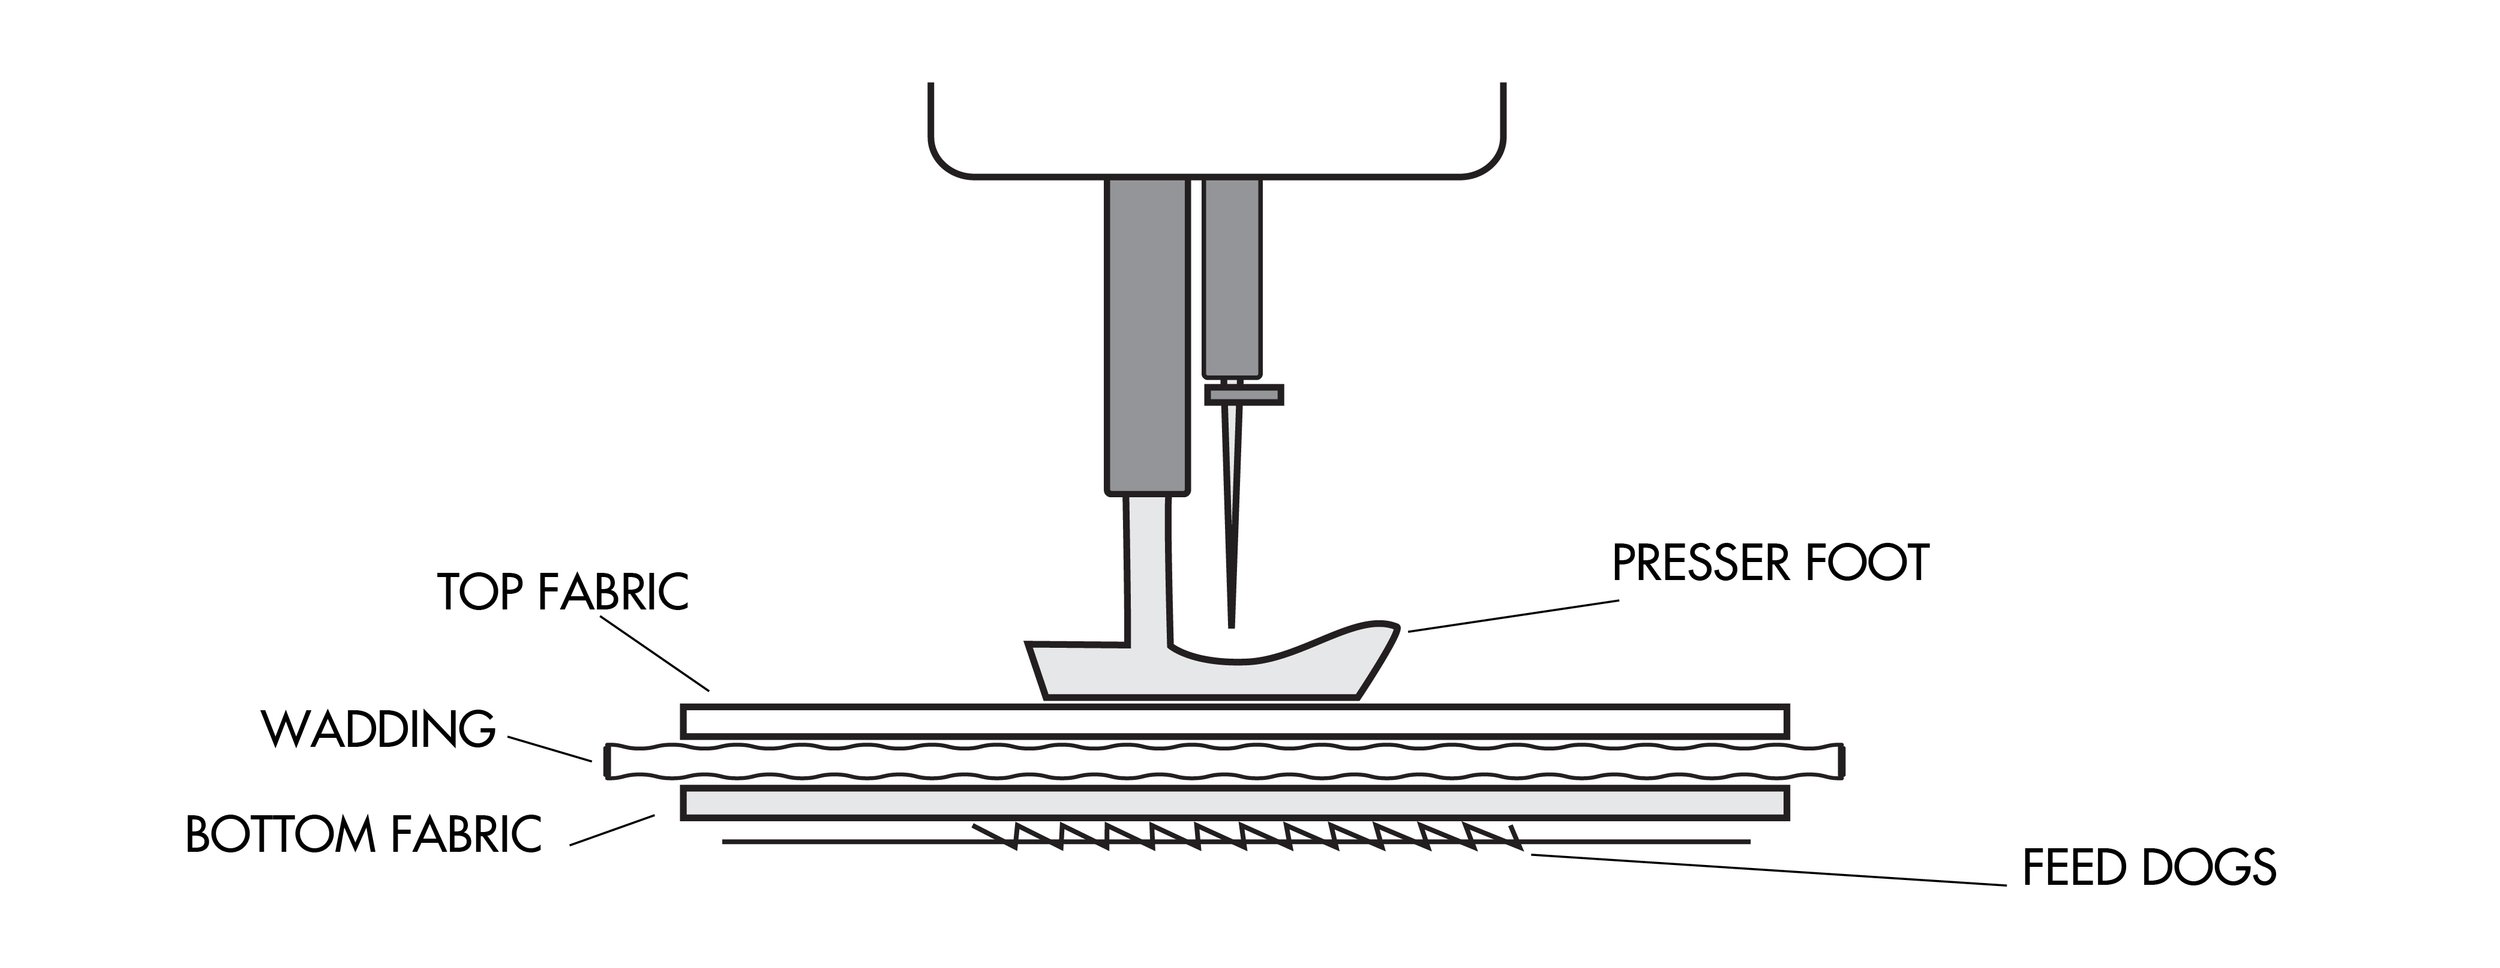
Layers of fabric from side view
Here are some pointers to help reduce the amount your fabrics might move.
By pinning your fabrics together at small intervals, every 10cm for example, this will help to keep the layers from shifting too much. Be aware though, that it won’t stop it completely, and you may need to stop every so often to reposition and flatten things out.
Basting your fabric also helps. Similar to pinning, your basting stitches should be made at intervals across the fabric so that it all sits evenly.

Pinning or basting your fabric holds your fabric layers together
Having a walking foot for your machine can be a great help. This nifty little gadget has a feed dog for the top layer of fabric, which increases that grip I spoke about earlier. It presses down and pulls your top layer of fabric along evenly with the bottom layer as you sew. Basically, it pinches them together so they don’t shift.

A walking foot helps feed the fabric through the machine, from above and below at an equal speed.
A walking foot is really handy, but not necessary. You can always pinch the fabrics together yourself but where you pinch them is key. And I mean pinch! Pressing down hard on the layers as you sew won’t do the same thing, you need to grip it from both sides. Try to hold the layers together directly in line with the needle and pull ever so slightly as you sew, to create just a tiny bit of tension. Don’t pull too much or else you’ll get messy stitching! It takes a little bit of practice to get the feel of it but doing a few tests on some scraps should help you see how great this trick really is. Try a few lines without holding the fabrics together, then try this technique and see the difference.
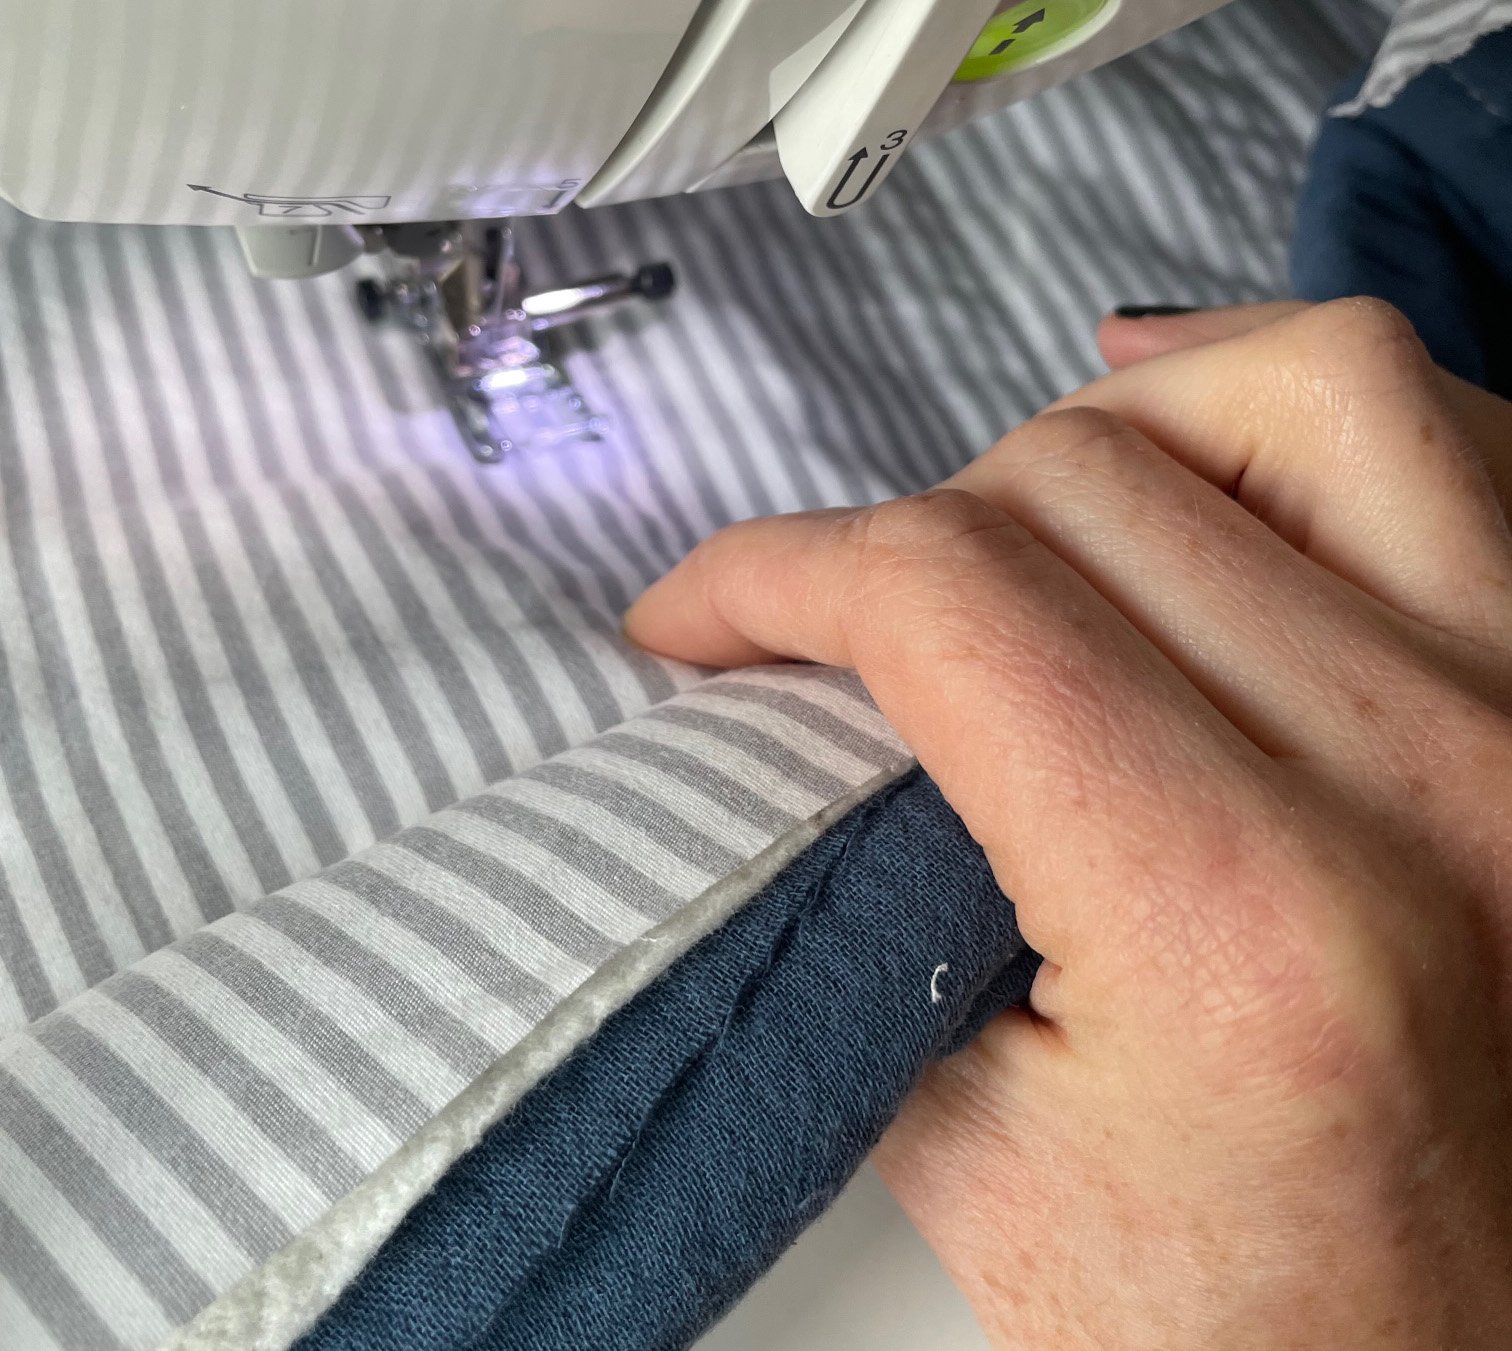
Use your forefinger and your thumb to pinch through all three layers, directly in line with the needle as you feed it into the machine.
With so many different types of wadding available, don’t get bamboozled. If it says suitable for quilts, it’s suitable for the Forest Coat. My personal preference is a cotton or wool, because I like natural fibres but there are loads of different types including recycled polyester and even bamboo. You may notice some waddings ‘with scrim’. Scrim is a thin layer of woven fibres that acts as a stabiliser and helps prevent the wadding from stretching too much when sewing. Perhaps that would help if you’re just starting out but I’d still follow the tips outlined above to prevent your fabrics shifting as much as possible.

For my samples, I used a low loft recycled polyester wadding from Fabric Romance and cotton wadding from Quilt Yarn Stitch. Both types of wadding held up really well in the process. There are plenty of other waddings available on their websites so be sure to take a look. If you’re still in doubt, just pop them a message and ask. They were both super helpful to me when I was looking for my wadding. (Not sponsored, I just think they’re great!)
I hope that is of some help and I’d love to hear how you get on.
Happy sewing as always!
x