
Sew a French Seam and a Vent.
We all love a French Seam. It gives that extra special finish to a garment and has the ability to make you feel smug as **** knowing that you could turn that garment inside out and it’d still look ace! That’s all well and good when you’re talking about a regular seam but what if you want to use a French Seam when the seam splits into a vent? Brain bending right? Well, not quite. Here’s how you can make it happen and be extra smug with your make!

STEP 1:
I usually sew using a 1cm seam allowance which is what I’ll describe here but the idea is the same if you use a wider seam allowance. Just adjust the seam widths accordingly.
So for a 1cm seam allowance, you’ll have a 5mm finished seam.
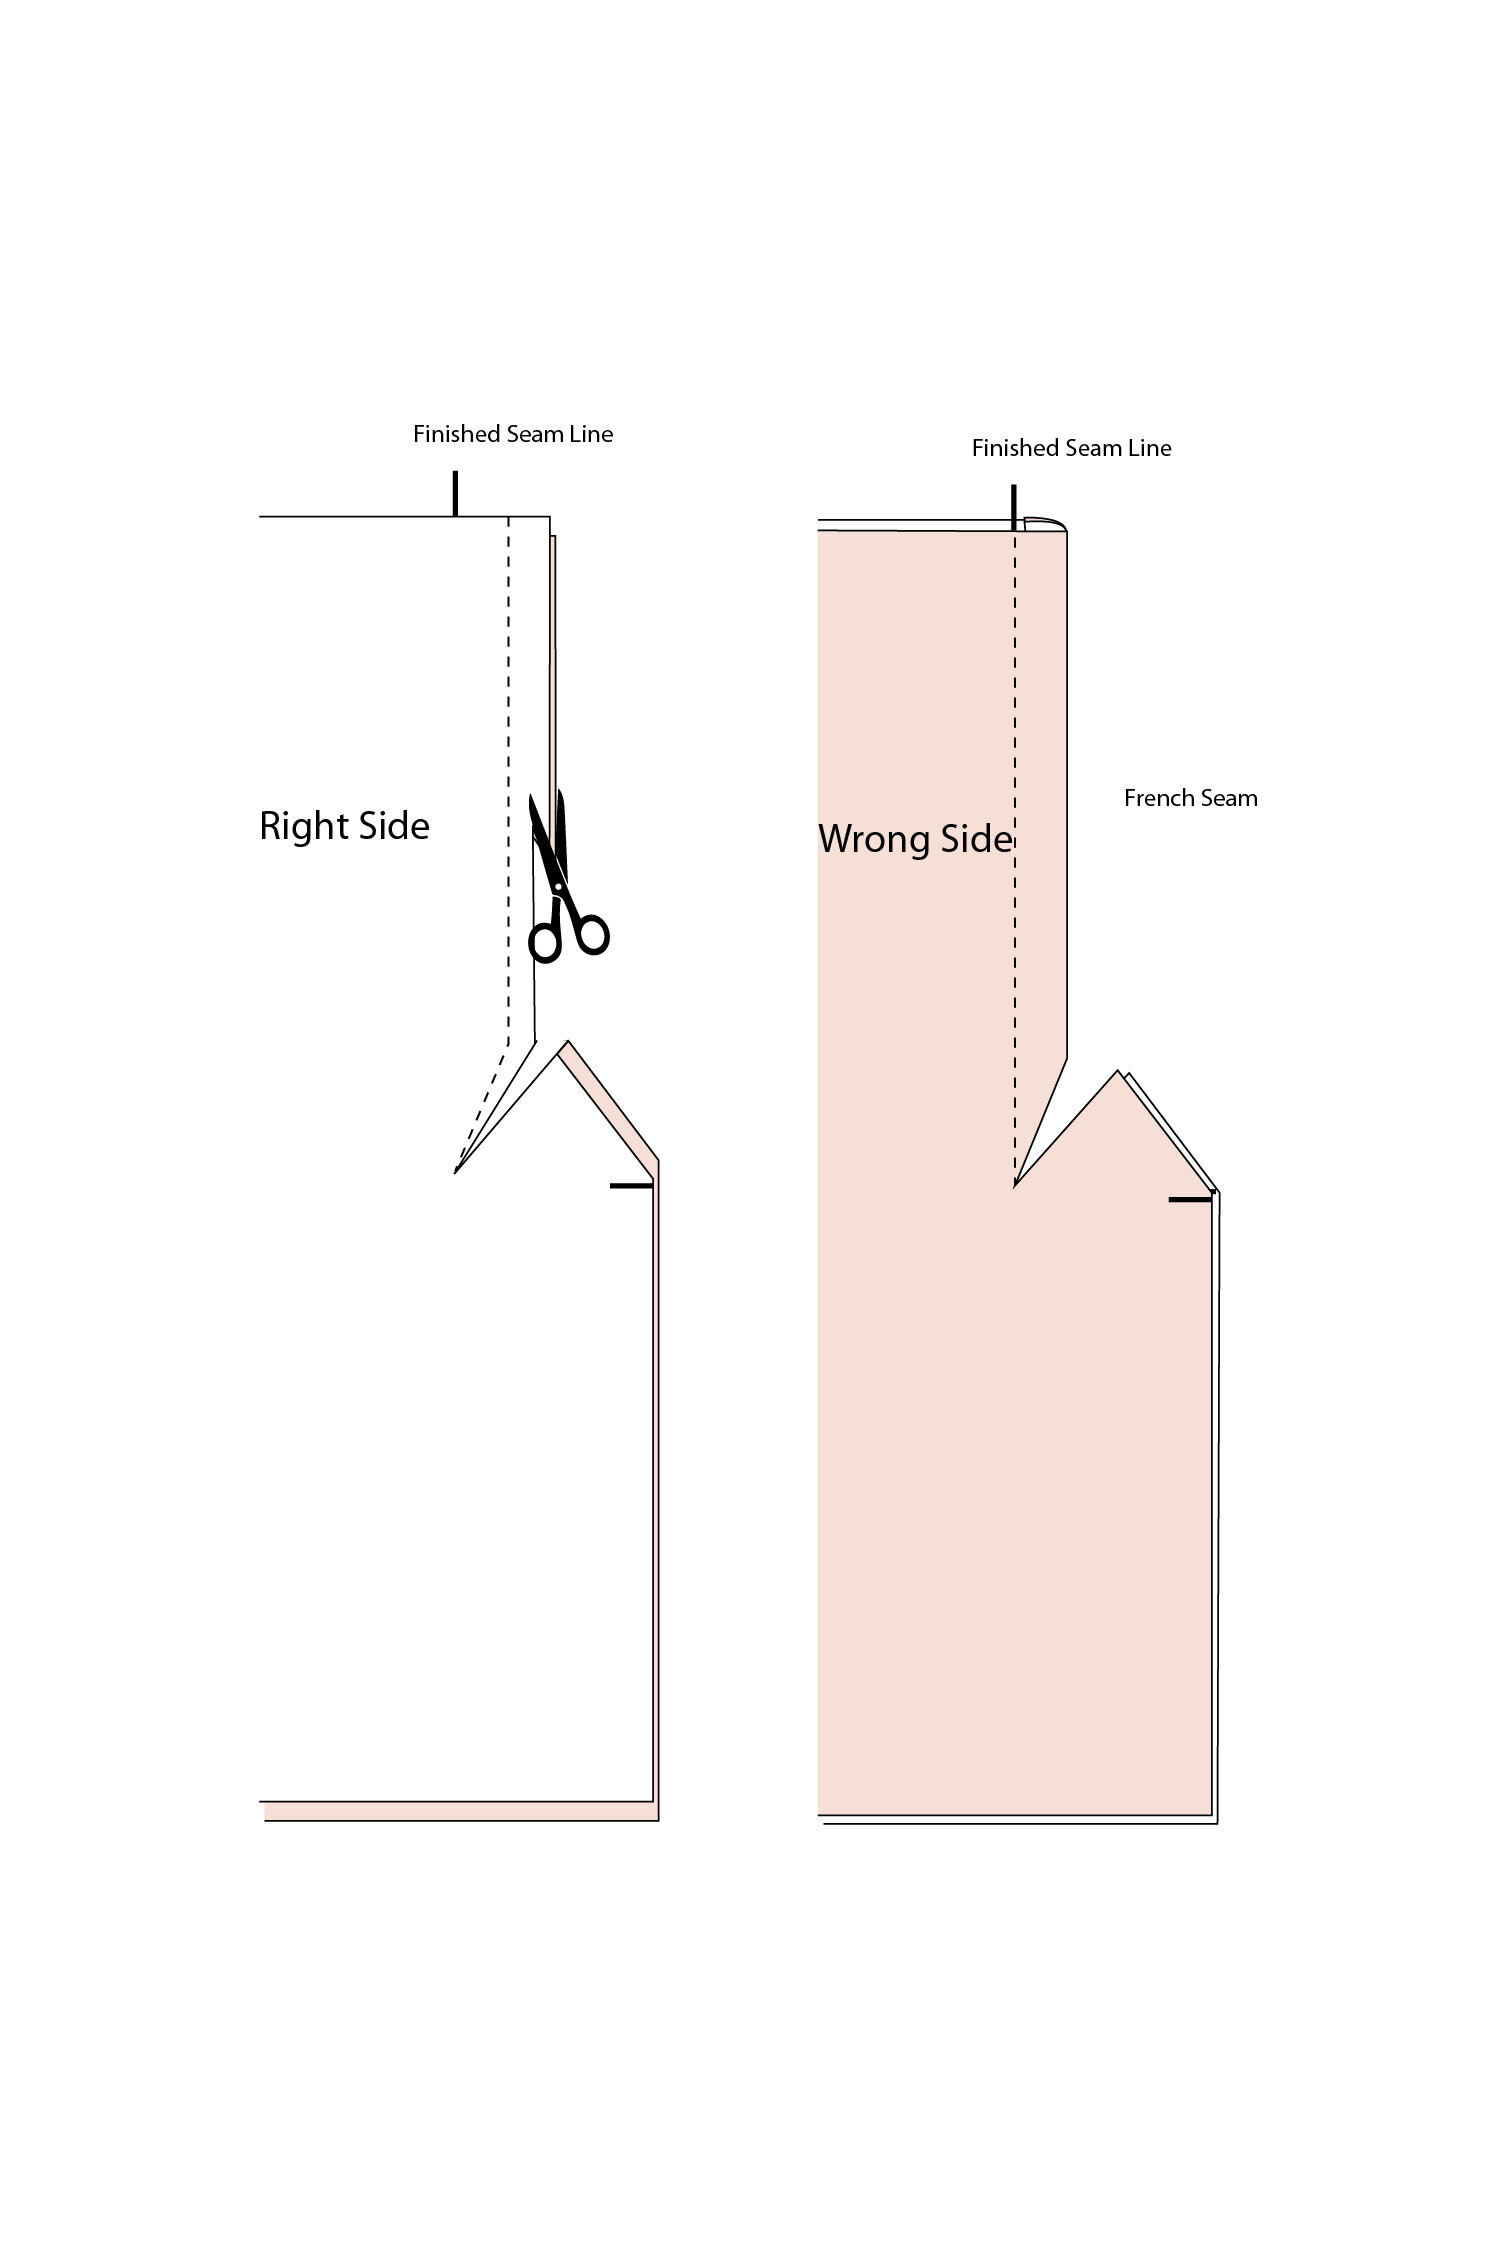
Wrong sides together, sew 4mm from the raw edge down as far as the top of the vent.
Needle down, pivot the fabric and sew inwards to a 1cm allowance, down as far as the vent notch.
Snip from the top of the vent into the last stitch (careful not to go beyond it though)
STEP 2:
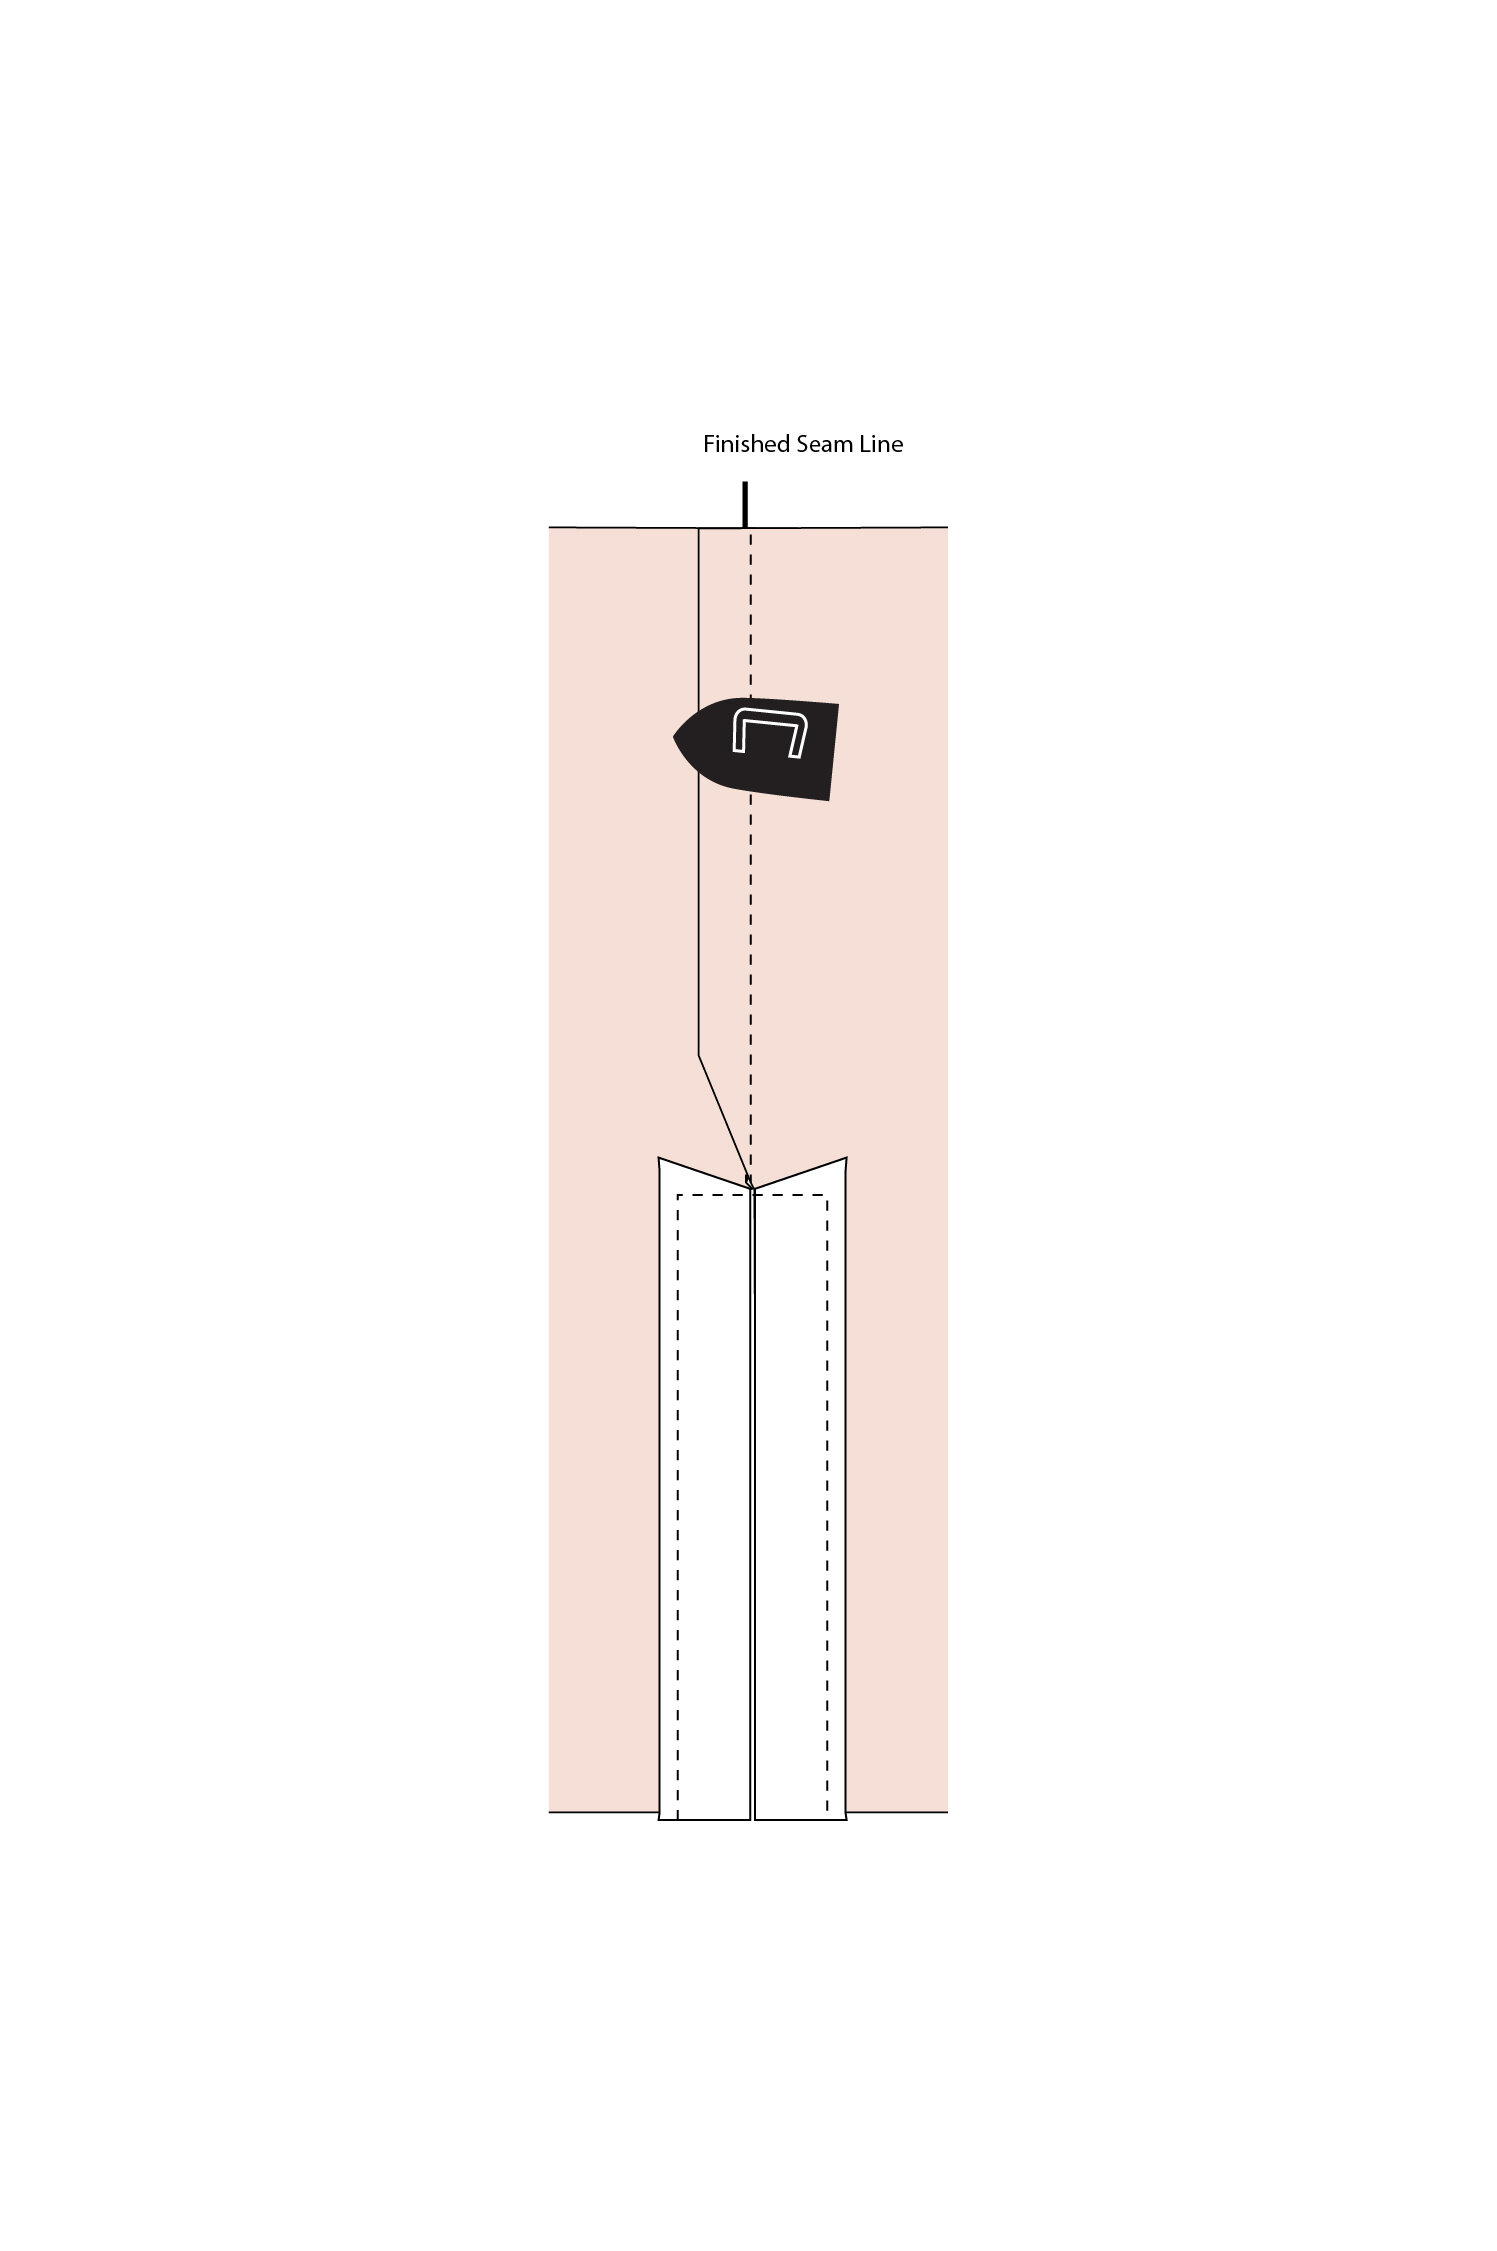
Trim back the seam edge to about 3mm and fold the seam back on itself so right sides are now facing.
Poke out the corner near the top of the vent and press.
Sew 5mm from the edge straight down the seam line as far as the notch in the vent.

STEP 3:
Fold back the vent at the apex, lengthways, wrong sides facing and press.

STEP 4:
Fold down the apex so the point is just inside the raw edge of the vent.
Press in place.

STEP 5:
Fold back the vent again and press.
Repeat on the other side.
STEP 6:
Starting at the hem, stitch the vents down, 2mm from the edge, pivot at the top to sew across the seam. This will trap the apex you folded earlier. Pivot again and sew down the other side to the hem.
Press the french seam to one side.

STEP 7:
Flip your garment over to the right side and press the vent for a clean finish.