
Butterwick Coat B6385
PROJECT:
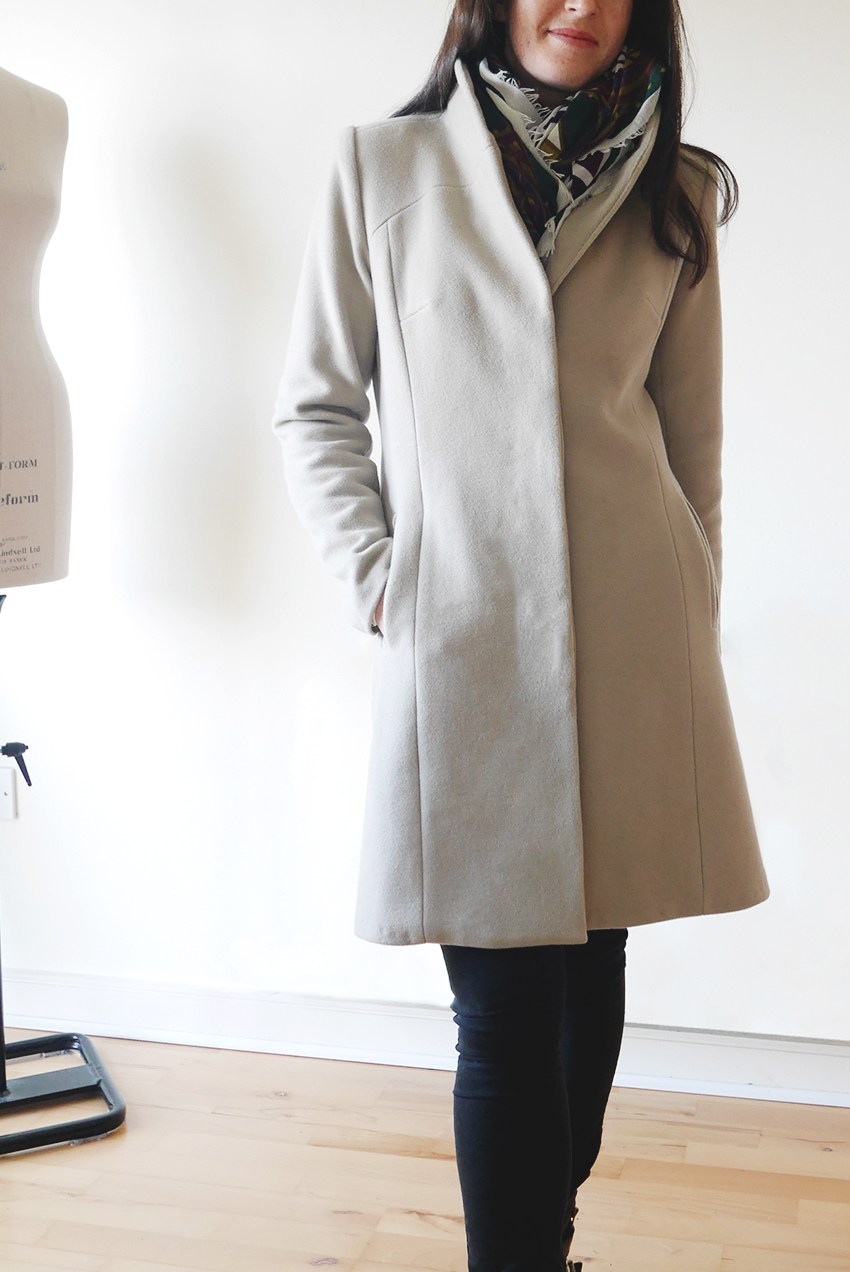
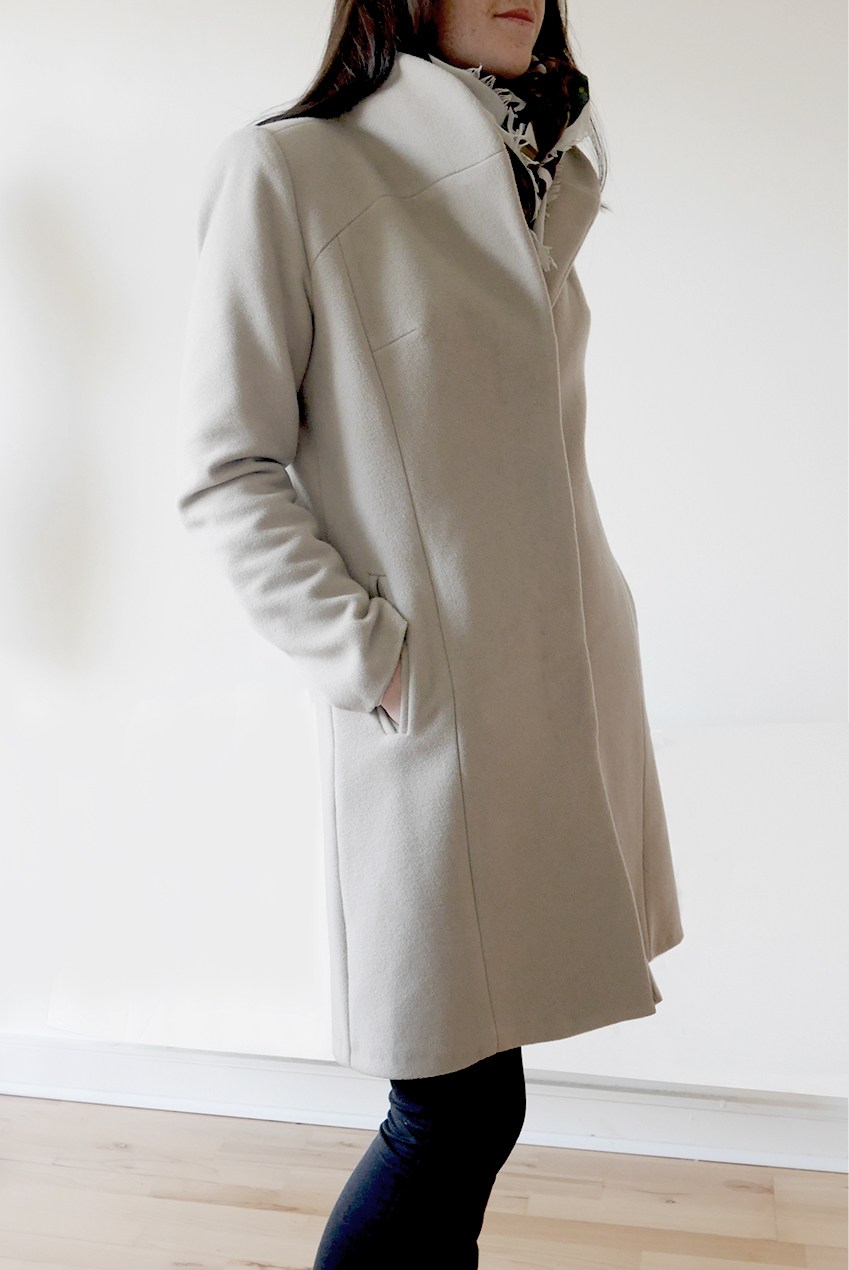
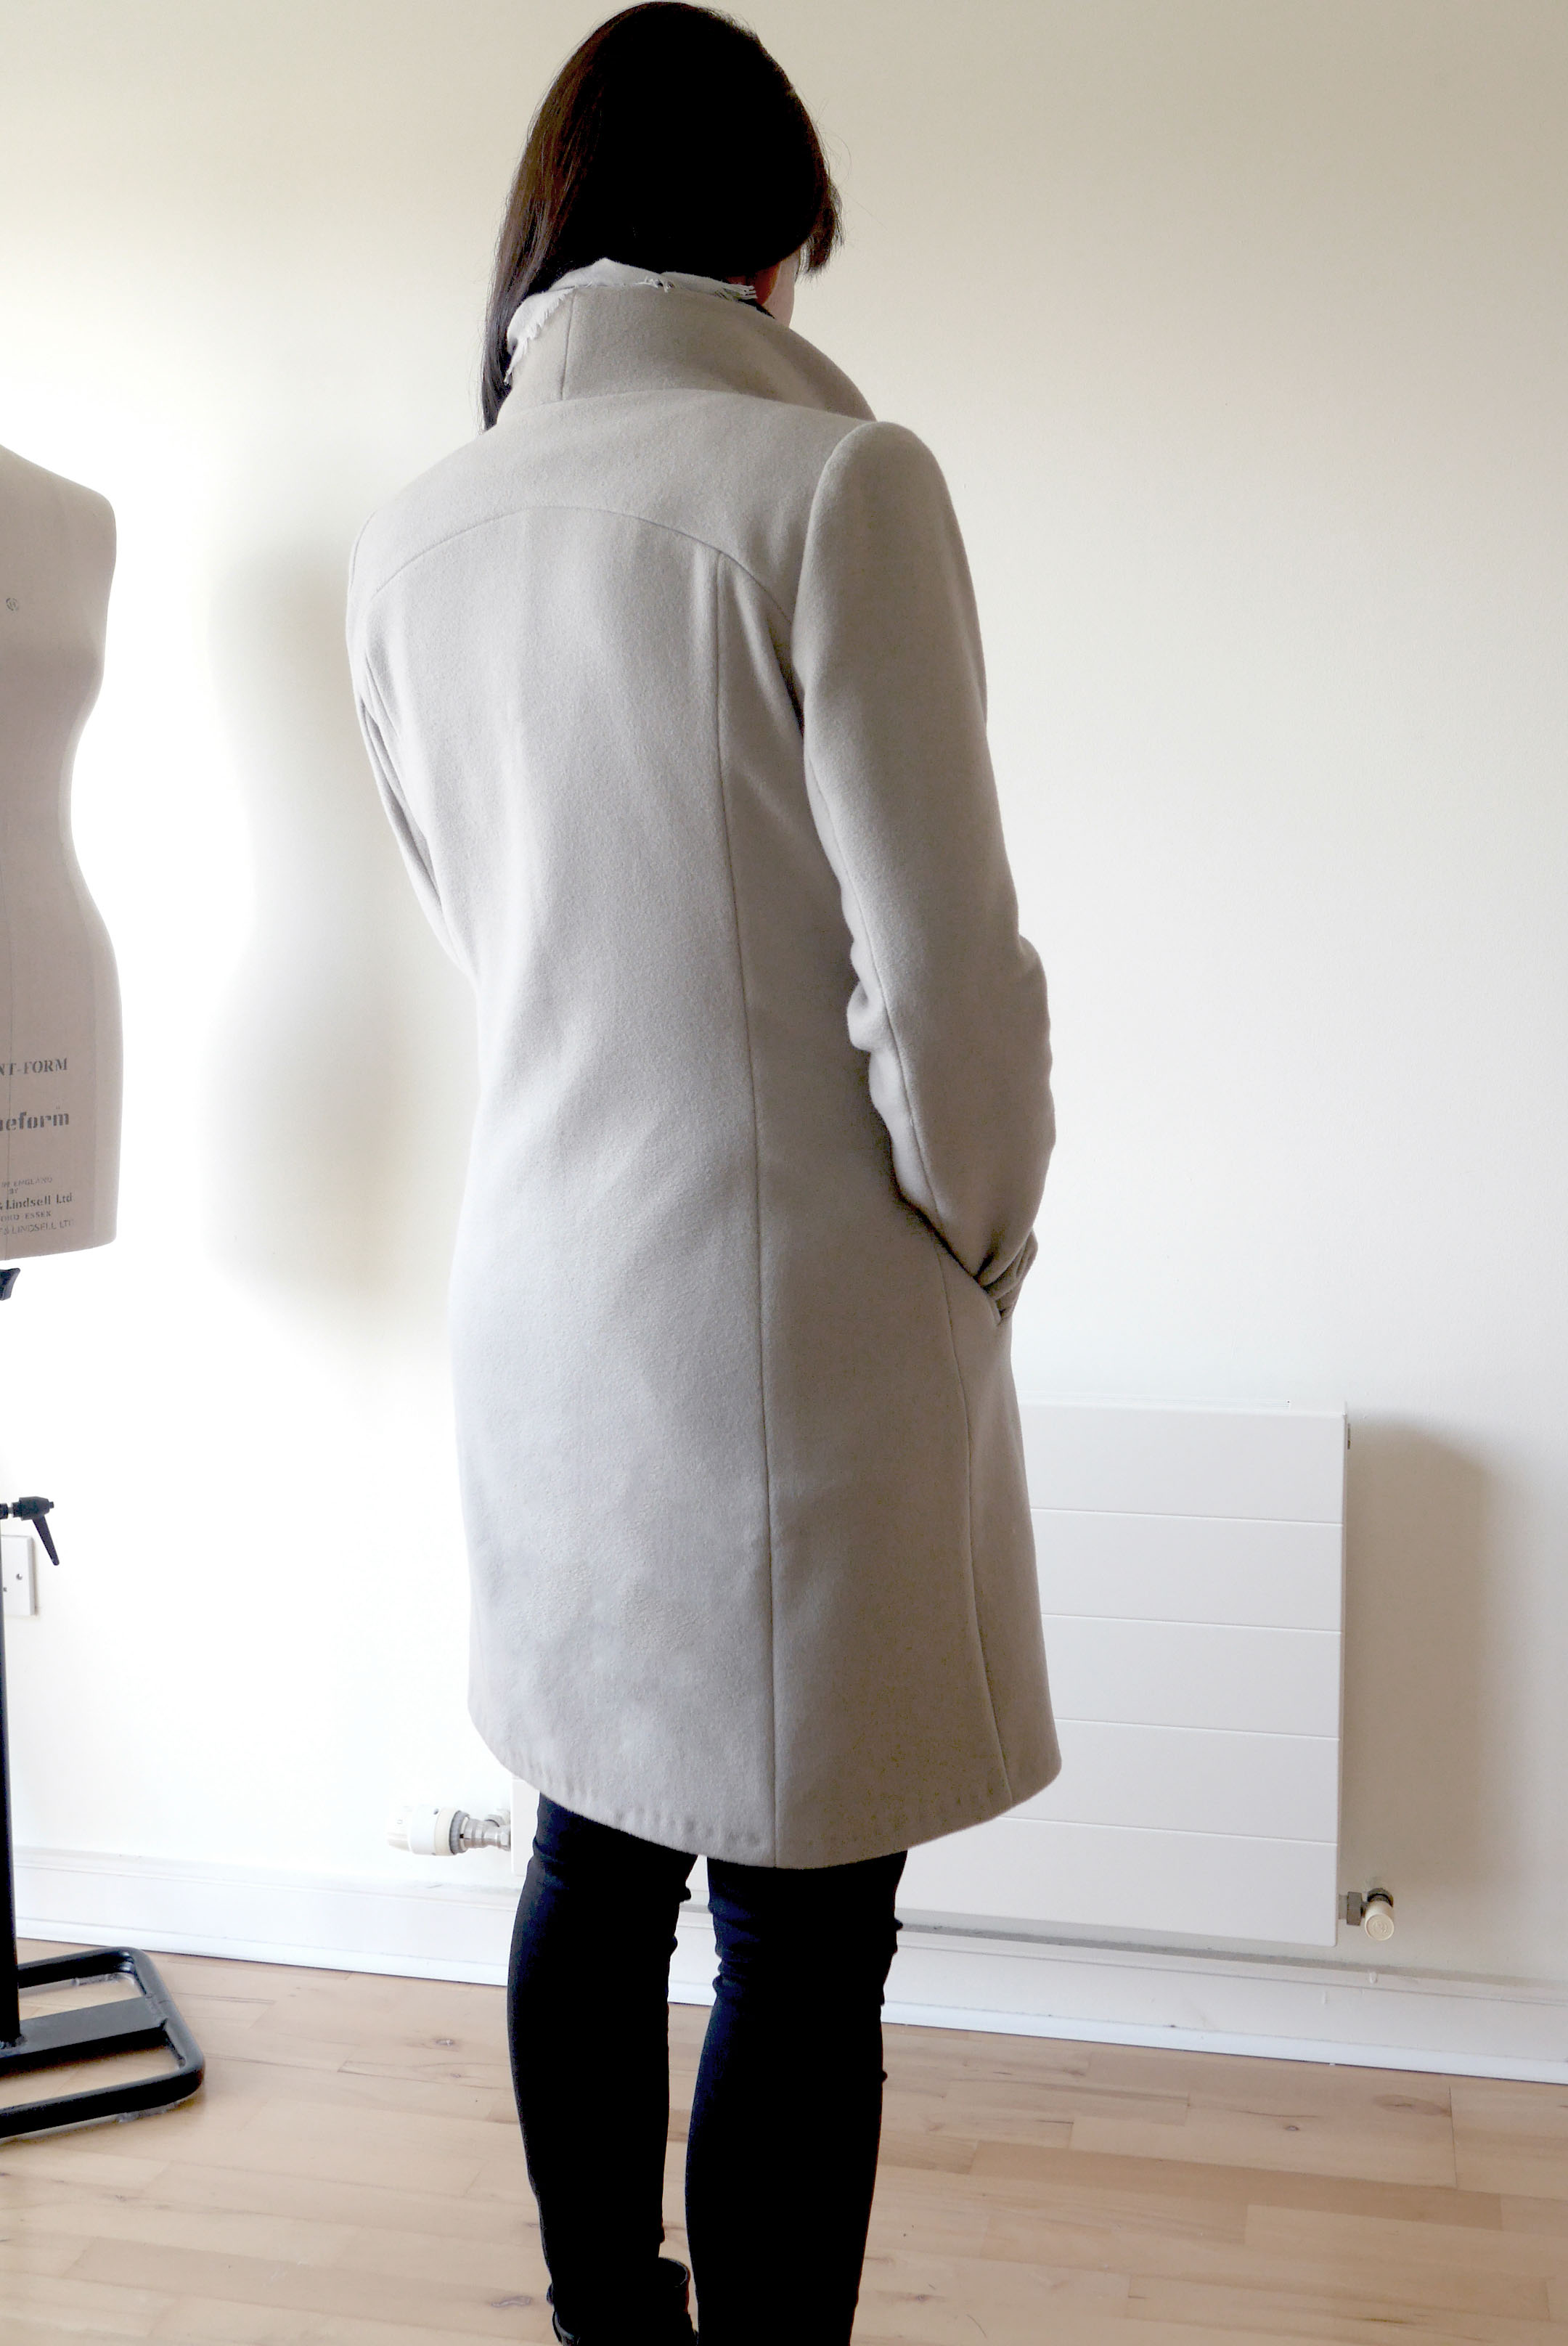
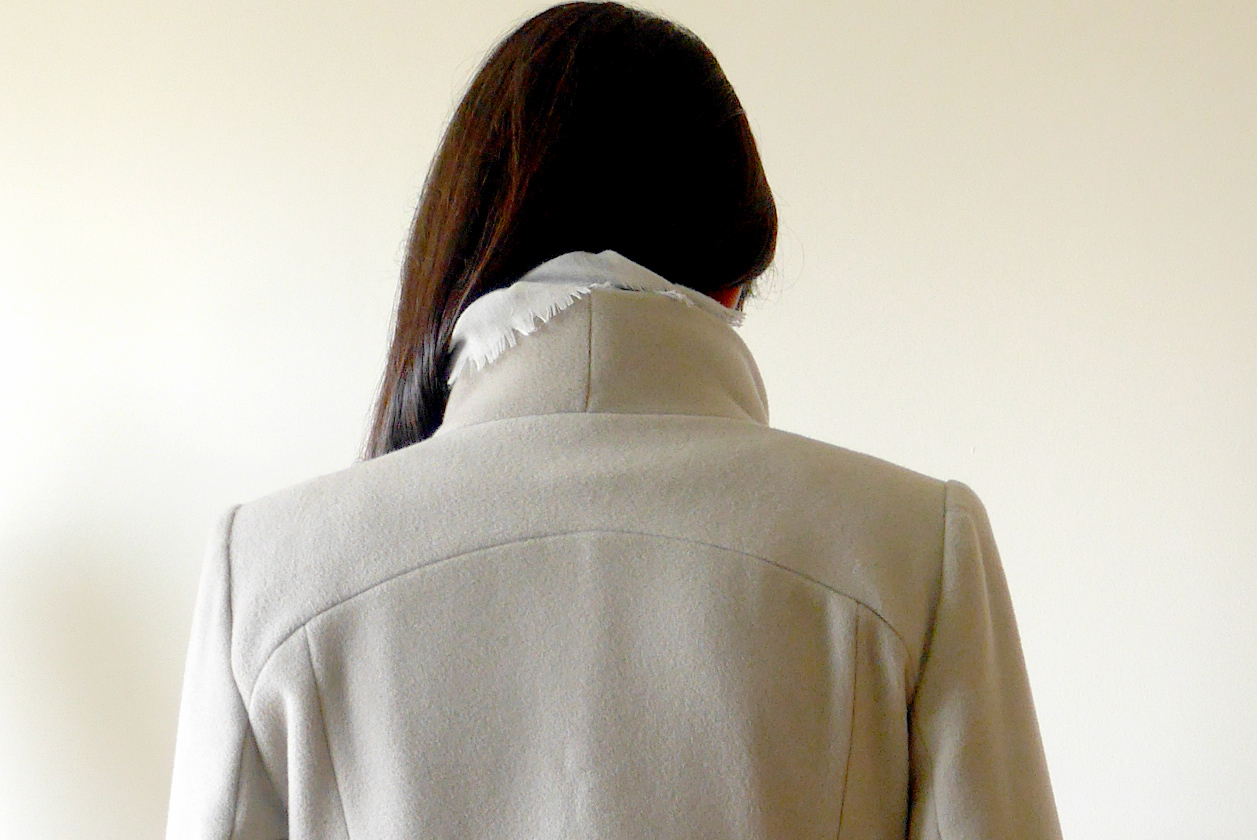
A fully lined Winter coat with standing collar to keep the wind out.
PATTERN: Lisette by Butterwick Coat pattern B6385 - my first ever BIG 4 pattern!
REASONS FOR MAKING: My current coat was well past shabby so I figured I'd give this a bash. I knew I had a great fabric so it was also an excuse to use that. And having a slightly dressy coat is always handy. I've called her Ophelia because I finished it the same time that storm Ophelia hit Ireland!
FABRICS: A gorgeous soft cashmere mix coat fabric, kind of like the sort you find in Reiss. The colour is like a mauvey stone. Lining is a cream, burgundy and green dot fabric I had in my stash.
TRIMS: 4 x 4 hole buttons
HOW TO: I had toyed with the idea of drafting this myself but since it's been so long since I've done anything resembling a tailored shape, I wanted to at least know the fit was correct so I bought this Butterick pattern. I'm not sure why, but I couldn't bring myself to just do the pattern as is so I hacked it a little. Not much, but I just wanted to feel like I had put my own mark on it. I decided to give it a stand up collar that extended into a front lapel. I created a chest yoke and shoulder yoke for some interest and I curved my sleeves at the elbow a smidge to give them a nicer shape. I didn't want my buttons on show so I put in a hidden button placket. So here's how it went.
Front - I balanced out the dart to avoid having any weird bumps, attached the front panels together then added the front chest yoke / collar / lapel. I included 2 jeet pockets in the front side panels.

Back - Nice and straight forward, joining the back panels together then attached the shoulder yoke.

Front to Back - This was a wee bit tricky since my front panels included the collar so I had to join them first at the centre back, then attached it along the neckline with the shoulder seams. It required snipping into corners as I sewed and that was probably the most fiddly part.

Sleeves - I was a bit nervous with these sleeves as I wasn't entirely sure about their pitch marks and the cap looked a bit pokey on paper so I had to batter these in a bit. A good press and they eventually came good. I also narrowed the sleeve a bit when I tried it on as they just felt too baggy.
Lining - My front facing is the same fabric as the coat. After that, in terms of construction, everything was as per above.

Interlining - I fused the entire front as per the pattern instructions. In the past I'd have included more tailoring layers and extra bits of fusing in places but being so out of practise, I just followed the pattern instructions so it would be finished. This just made me realise I need to remind myself of these techniques in future. I knew it wasn't as good as it could be. Shoulder pads went in on their own. I attempted a sleeve head roll but it looked too bulky so I took it off.
Buttons - I didn't want my coat to have visible buttons interfering with the style lines so I made a hidden button placket instead. I attached fused spotty lining onto my front panels and facing using this tutorial on Waffle Patterns.

Attaching the Lining - I used the bagging out method since it's the only one I know.
And here she is!
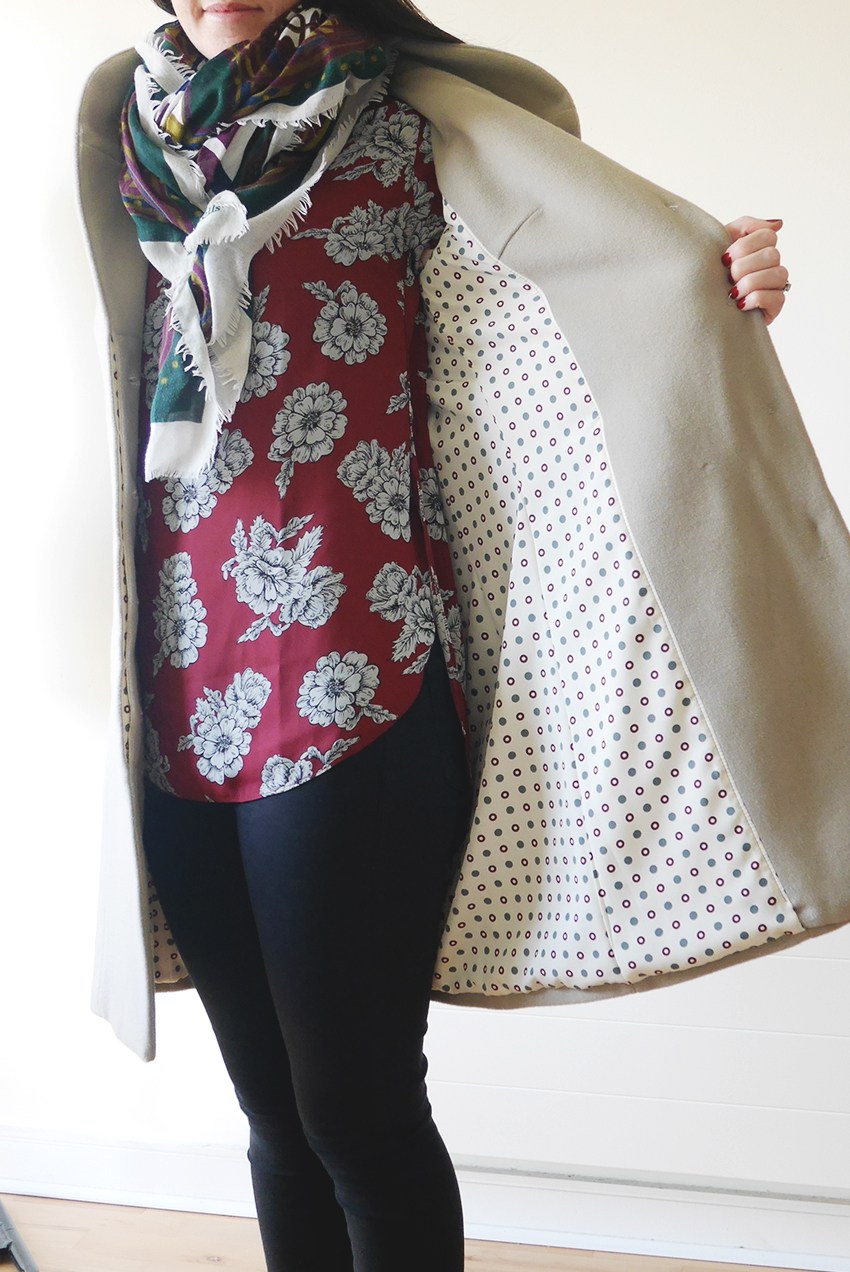
WHAT WENT WRONG: The lining. Oh the lining. Because I took a good bit off the hem when I was adjusting the pattern, I forgot to keep the bottom edge of the front panels as they were on the original hem which meant I had cut them to the same length. Oops. So after a fair bit of butchery, I managed to sort it all out...just don't inspect it too closely!
LESSONS LEARNED: If I had more time and more confidence, I do actually think I could have drafted a simple coat pattern myself. And I might yet. I've also learned that like most people, I'm very lazy about making full toiles. I probably should have done one to iron out any little annoyances (like the lining!) but if I had done that, it would have been next Winter by the time I'd have finished and who wants to wait that long?
VERDICT: This was the first big commercial pattern I have ever used because I have only ever drafted my own patterns and only recently used a few indie patterns. I liked that this pattern was ready to go but I still love the process of drafting my own. When I work with my own patterns, I know what details are where, I know my own notches, where I can get away with nipping / tucking and I'm used to 1cm seam allowances rather than 1.5cm you get on most commercial patterns. But that said, I'm happy enough with how it turned out... Eventually!